RANGER Cat Doors for Walls


")
")
")
")
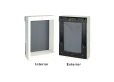


RANGER Cat Doors for Walls
Insulated Flap Seals Out Extreme Temperatures
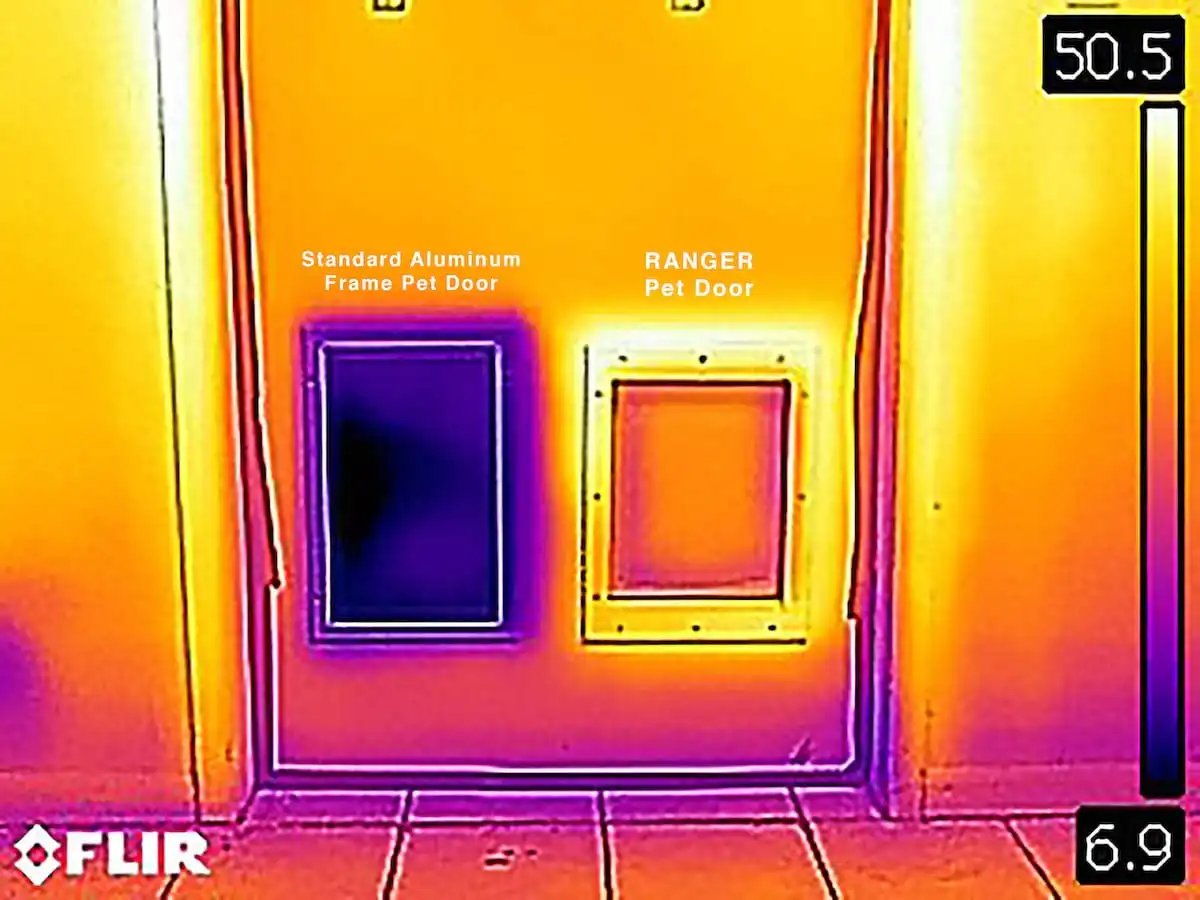
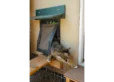
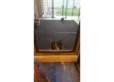
Right: RANGER, registering at room temp
Outside temperature was -1° F (-18° C) and indoor temperature was 55° F (13° C). Oranges, yellows, and whites are areas of relatively warm temperature, while purples and blacks are areas of relatively cold temperatures. Temperature scale is on the right of the image.
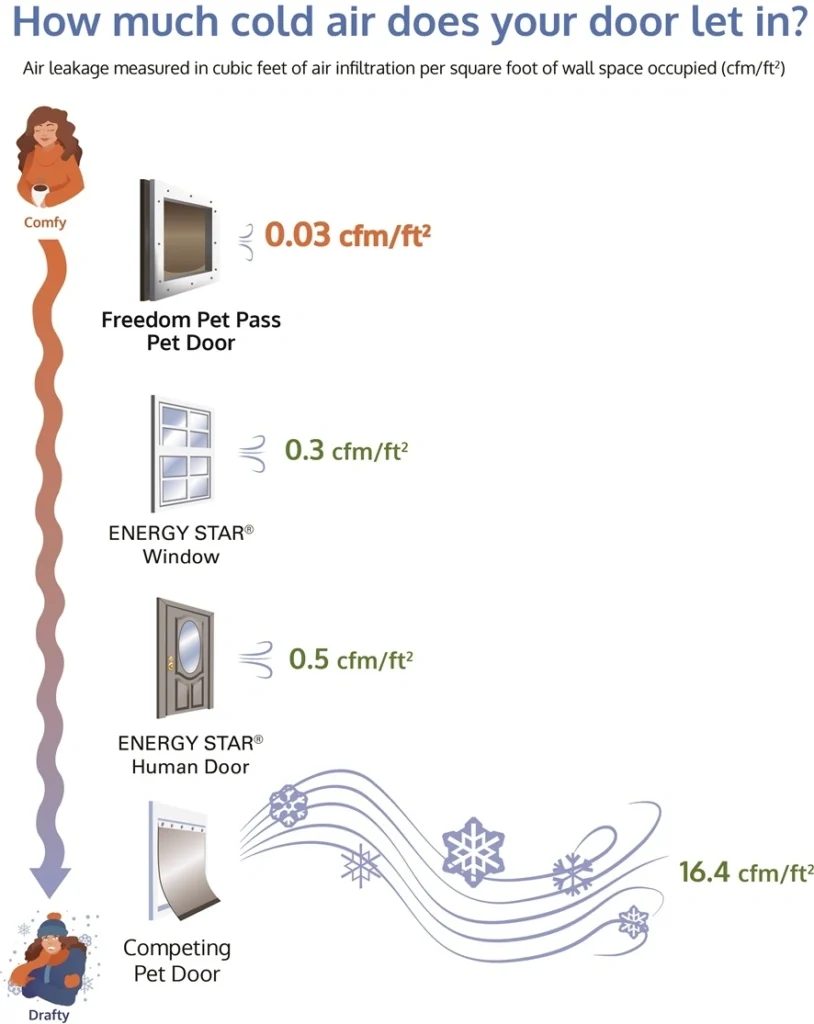
Avoid Leaky Pet Doors
Most cat doors are extremely leaky.
In fact, over 90% of the energy loss from conventional pet doors comes from air leakage – letting cold air directly into your home.
The RANGER pet door with DoubleMag seal is virtually airtight, so it keeps outdoor air outside where it belongs.
15X Better than Energy Star
The DoubleMag seal is so good, third-party lab testing showed that it is 15X better at preventing outside air from coming in than US Energy Star requirements for human doors.
500X Better than Other Pet Doors
Other brands pet doors don’t actually make a seal. Even those with a “double flap” or magnets to “keep the door closed” aren’t good enough, because they don’t actually seal out the wind and drafts.
Lab testing with the “best selling” pet door shows how much better RANGER cat doors perform. Under official testing conditions, the competitive door leaks over 16 cubic feet of air per minute per square foot.
That’s over 500X worse than the RANGER pet door standard of 0.03 cfm/sq ft!
15X Better than Energy Star Standards
Insulated Flap System
RANGER cat doors have a thick, insulated flap to reduce conductive heat loss, which is heat loss through material. Made for cold weather, the flap components will stay flexible and functional to -40 and below.
Insulated Frame Material
The cellular PVC used in our frame is 3,000X more insulating than the aluminum material used in the frames of lesser pet doors.
Zero Drafts
With pet doors, most energy loss comes from convective heat loss – cold air blowing in around a poor seal. The DoubleMag seal on RANGER Pet Doors eliminates air leaks.
Actual Lab Data – Not Marketing Hype
Many pet doors “claim” energy-efficiency with bogus comparisons and no proof.
RANGER pet doors have extensive independent laboratory testing that prove how efficient they are.
Our doors are evaluated using the same tests that are used for Energy Star certification for windows and human doors, and the results show that RANGER cat doors are 15X better at blocking outside air than requirements for human doors.
Engineered from the Best Raw Materials
Note: to prevent injury to pets and damage to the door, do not use the security panel to lock your pets outside.
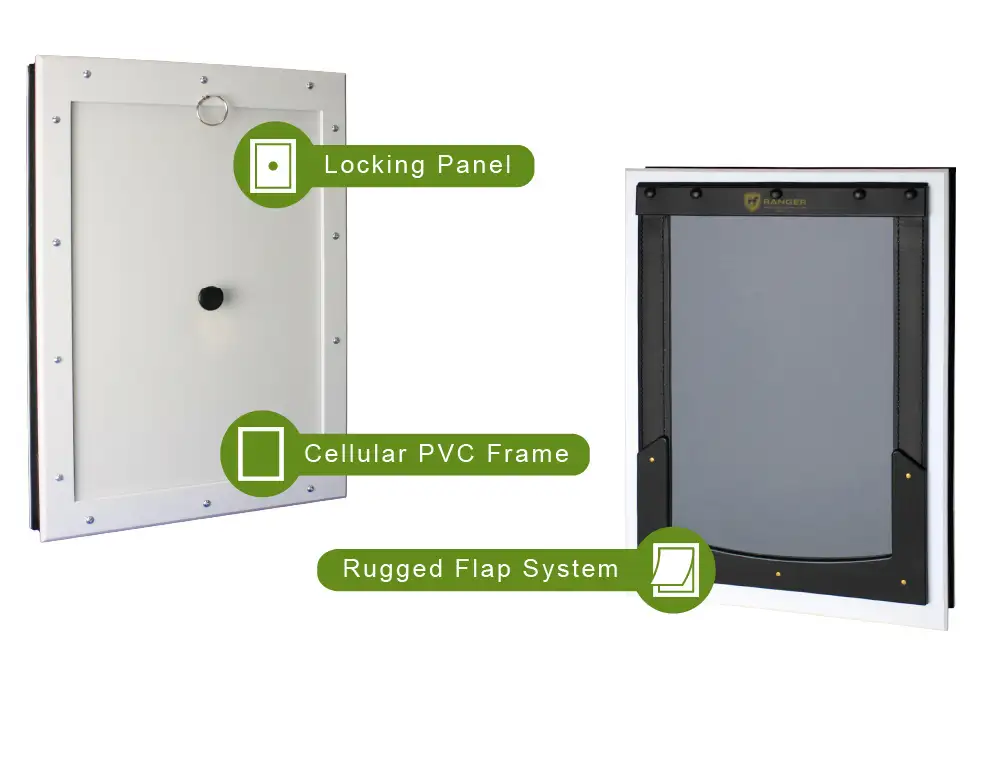
Cellular PVC Frame
Strong, weatherproof, and mold-resistant, and 3,000X more insulating than metal frames used on lower-end cat doors.
Rugged Flap System
The insulated flap system is made from premium materials for maximum energy-efficiency, pet safety, and durability. The flap has an insulating SBR rubber core, protected with marine-grade canvas on each side. The flap seal is made from thermoplastic polyolefin, a material also used for industrial roofing.
Locking Security Panel
All door-mounted RANGER cat doors include a locking security panel. The “up-and-in” insertion of the panel means no additional clearance is needed around the pet door.
Written Instructions

RANGER wall-mounted pet doors come with thorough written installation instructions. If you would like to download and print the written instructions, click the button below or the picture of the instructions.
If, after reviewing these instructions, you are not confident in your abilities to successfully install the pet door, you should consider enlisting the help of a licensed contractor or handyman.
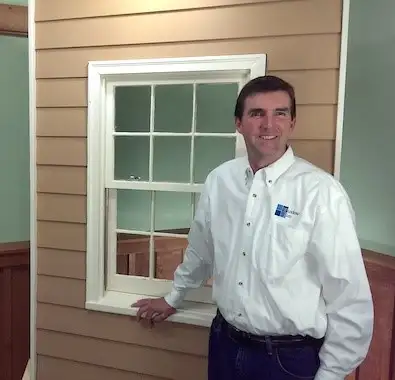
About the Instructor
We wanted to provide you, our customers, with a method of installation that would be good for both your pets and your home’s integrity. Most pet door installation techniques do not conform to building best practices or code requirements, and we wanted to solve that problem.
In these instruction videos, nationally-recognized window installation expert Jim Snyder (aka “Window Jim“) demonstrates techniques he developed for properly retrofitting a pet door into an existing exterior wall. While the videos below were created for use with our doors specifically, these principles can be used while installing any brand of pet door. Jim touches on critical steps that are skipped by other pet door installation instructions, such as framing and sill panning. Even if you choose to purchase a different brand of pet door, please consider using these techniques to minimize the risk of damage to your home from poor installation methods.
Jim has over two decades of experience as a professional window installer, and has spent the last ten years of his career consulting with major window manufacturers and doing fenestration research. He is highly credentialed, a member of important industry groups, and regularly contributes to Window and Door Magazine. You can be confident that you are getting the best possible guidance.
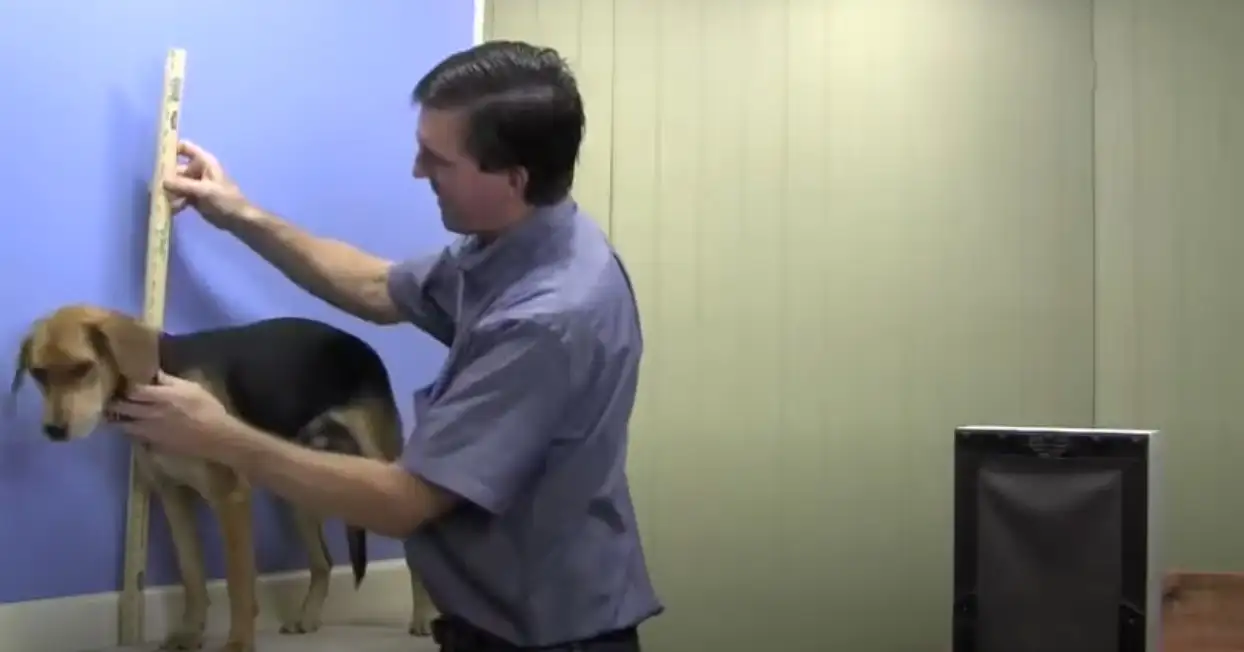
Jim is also a pet owner, having both a cat and a dog in his family. Jim’s beagle Paul, is one of the stars of the installation video.
Brick Mold Casing (optional)

Using brick mold casing as exterior trim is optional for the installation of a RANGER Pet Door by Freedom Pet Pass. In some cases, it can help integrate the pet door into the weather barrier system. Some people view adding brick mold casing as an aesthetic improvement, but this is obviously subjective.
Brick mold casing is not included with the pet door, but it is widely available at home improvement stores for relatively low cost.
If you decide that you want to use brick mold casing for your installation, we provide step-by-step instructions for making and implementing it. If you choose not to use the brick mold casing, there will be some sections of the installation that you will have to slightly alter from what is demonstrated on the video.
2. Create Hole in Wall

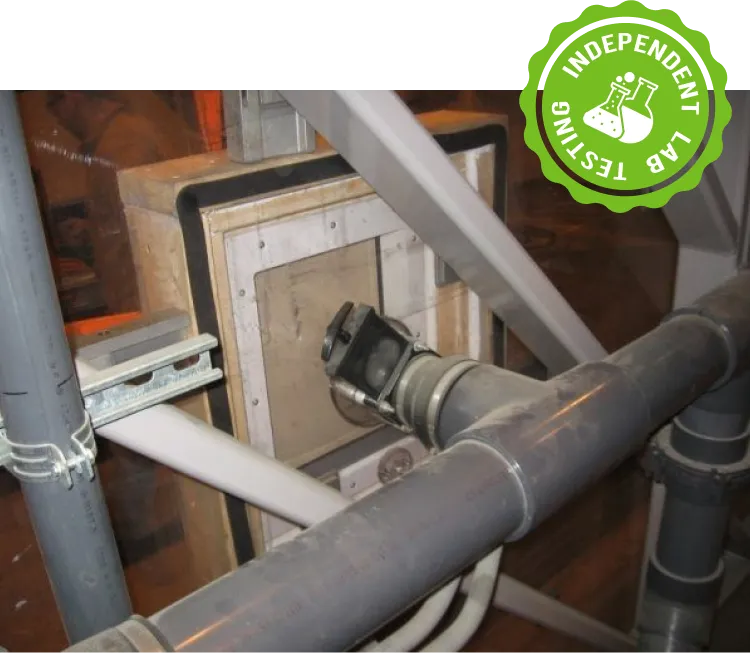
The installation location for a wall-mounted pet door should be chosen with care. Take all necessary precautions to avoid or safely work around electrical, plumbing, and gas lines. If you are unsure about how to handle possible in-wall hazards, contact a licensed professional.
Using a stud finder, locate the approximate stud positions. Ensure width of studs will accommodate width of pet door.
Choose one stud against which your pet door will be positioned and begin to open the wall. This is most safely accomplished by using a small scrap of 2×4 wood material and hammer. Start near the edge of the stud and slowly make a small opening to verify the stud location.
Once you have verified the stud location, position template against the wall with one edge against the exposed stud and the top at the height measurement (your pet’s height at the withers + 3 inches). Ensure the template is straight and level, and trace around the rough opening hole template.
Gradually open the wall with the wood scrap until you can verify the lack of hazards behind the wall. From there, cut the rough opening with a drywall saw.
Remove insulation and clean the rough opening for the next steps.
3. Cut Rough Opening Materials

4. Frame Rough Opening

Mark the location of the trimmer on the header and the sill. Make sure the marks are visible when installing these components.
Install the blocking components, fastening in place with appropriate screws:
- Install the sill risers and the sill.
- Install the cleats and header.
- Install the trimmer filler(s) and trimmer if needed.
Finish any remaining drywall cuts, using the framing as a guide.


8. Insert and Attach Door

Insert the door into the rough opening. The pet door should be shimmed as appropriate for a sturdy, level, and square installation
The pet door must be attached to the rough opening through the side jambs and head jamb to accommodate the force of pets passing through it. Decorative screws are provided for this purpose, although alternate fasteners can be used at the installer’s discretion. Use sufficient anchorage fasteners to satisfy regional structural requirements.
The four shorter screws are intended to screw through the side jambs, two on each side at least 2’’ (50 mm) from the top and bottom to avoid the screws used in the assembly of the product. The two longer screws are intended to attach the head jamb to the rough frame. To prevent damage to sill pan, do not anchor through bottom sill.
If the optional brick mold casing is used, screws may be driven through the brick mold casing into the framed opening for additional strength and installation convenience.
9. Insulate and Seal

From the interior, insulate the perimeter between the pet door frame and the rough opening on both sides and head jamb only with low-expansion foam designed for this purpose.
Do not do this under the bottom jamb. This needs to be left open for drainage of incidental water.
After expansion is complete, remove excess. Seal all four sides at interior-most edge of pet door (including the bottom) with backer rod and a sufficient bead of sealant designed for this purpose.
From the exterior, seal between the pet door (or the optional brick mold casing) and the siding material with an appropriate weather-resistant sealant. This should be done on all four sides.
10. Interior Trim

If the optional brick mold casing was not used, trim the exterior as appropriate for your exterior wall covering.
Dress the wall cavity as appropriate. This can be accomplished with the optional jamb extension kit or with materials available on-site. Drywall returns are common, as are jamb extensions made from stained or painted wood. Cellular PVC (such as Azek brand), laminate (such as Formica brand), and tile are more exotic materials that some customers have used successfully to dress the wall cavity.
In the video, Jim demonstrates a way to make your own return box out of primed pine trim boards.

Technical Data Sheet

The technical data sheet (TDS) provides a summary of all of the technical details of RANGER Pet Doors.
The TDS includes all dimensional information as well as energy-efficiency testing for all pet doors.
ASTM E-283 Air Leakage

ASTM E-283 the official testing protocol for air leakage for fenestration products (human doors, windows, skylights, pet doors, etc.).
Testing at Architectural Testing, Inc. gave official air leakage of 0.03 cfm/ft2. Converted to metric, that is 0.15 L/s/m2, rounded by rule in the report to 0.2 L/s/m2.
These results are 15X better than US Energy Star requirements for human doors, and 10X Canada’s requirements.
This measurement is important because for most pet doors, air leakage (drafts) are the overwhelming source of energy loss.
ASTM C-1199 U-Factor

ASTM C-1199 is a testing protocol to determine the U-factor (insulation factor) of fenestration materials like doors, windows, skylights, and pet doors.
U-factor measures how much / how quickly heat flows through through a material, so with this measurement, the smaller the number is, the better the performance.
Our pet doors were tested and found to have a U-factor of 0.22 Btu/(hr∙ft2∙F). This equates to a metric value of 1.2 W/(m2∙K).
California Title 24

The State of California was the first jurisdiction to specify energy performance requirements for pet doors
Issue 104 of the California Energy Commission’s Blueprint newsletter specifies how pet doors are to be evaluated for compliance with Title 24 Energy-Efficiency Requirements.
On page 4 of this issue, the Commission states that pet doors are considered doors, and they are required to have an independently-determined U-factor and an air leakage rate of less than 0.3 cfm/ft2. The RANGER pet door is 10X better than this standard.
Frequently Asked Questions
30-ish Day Return Policy
If you are not 100% satisfied with your purchase, you may return the item for a refund.
We’re not sticklers for timeline, but please try to make your decision within a month or so of delivery.
Warranty
RANGER Pet Doors come with a 3-year limited warranty against malfunction due to manufacturing or material defects.
Lifetime Support
RANGER Pet Doors are designed to be the last pet door you ever have to buy.
We will always support owners of our pet doors, regardless of when they were bought or from whom. We will always maintain stocks of replacement parts, even for our oldest doors.
If you ever have any questions about your pet door, even if it’s really old or you’re not the original owner, please don’t hesitate to reach out and contact us.
Kate Flanagan (verified owner) –
I have one cat door and one dog door in my house. Best ever! In one year alone that cat door saved me over 400 gallons of propane and no, that is NOT a typo four HUNDRED gallons! Paid for itself 3 times over! Now I’m buying one for my garage. I live in Nebraska and these doors are perfect for our blustery winters. It might seem expensive but when you look at the savings, you can NOT lose.
Jill (verified owner) –
I purchased a cat door a little over 3 years ago. It is very well made and works great, however, my cats have never been able to open it. I have had to take the door flap off and leave it open to my garage. I returned to the site to see if there was a flap replacement because I was tired of hot or cold air blowing in. There is nothing wrong with the door and it is very well made. I do recommend it, but my cats just will not push it open. I give my cats only one star…
Donald Love –
Hi Jill – Maybe we can help upgrade the star rating for your kitties! One thing to try is to take the flap seal (black outermost piece that has the two magnets) and tie it up and out of the way for an interim period. This can help the cats get used to using the door. Then, when you put it back into place, you can put a clothespin on it to prevent it from completely sealing. This interim step can sometimes be the key. Once the cats are used to that, you can transition to having the complete airtight seal. If you have questions or wish to discuss further, please don’t hesitate to contact us.