Written Instructions
The RANGER Basic pet door is intended foradvanced DIYers and construction experts. Its essentials-only design gives maximum flexibility to the installer to incorporate into a wide variety of projects.
Because of this wide flexibility, this document can only give rough guidelines for installation rather than detailed, step-by-step instructions. If you have questions, please don’t hesitate to contact us.
Introduction
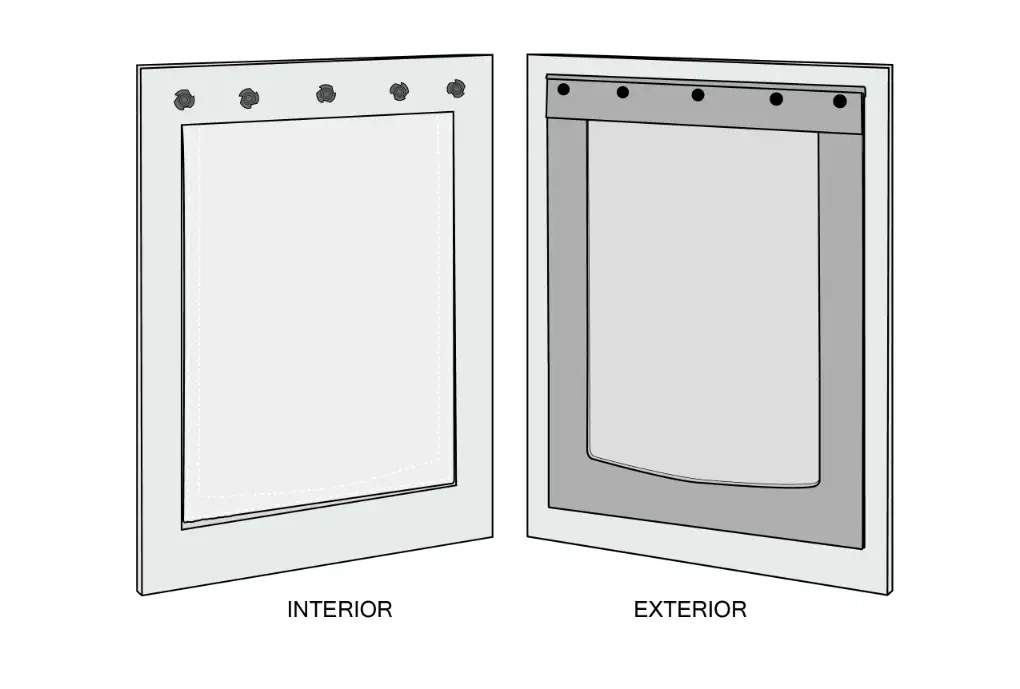
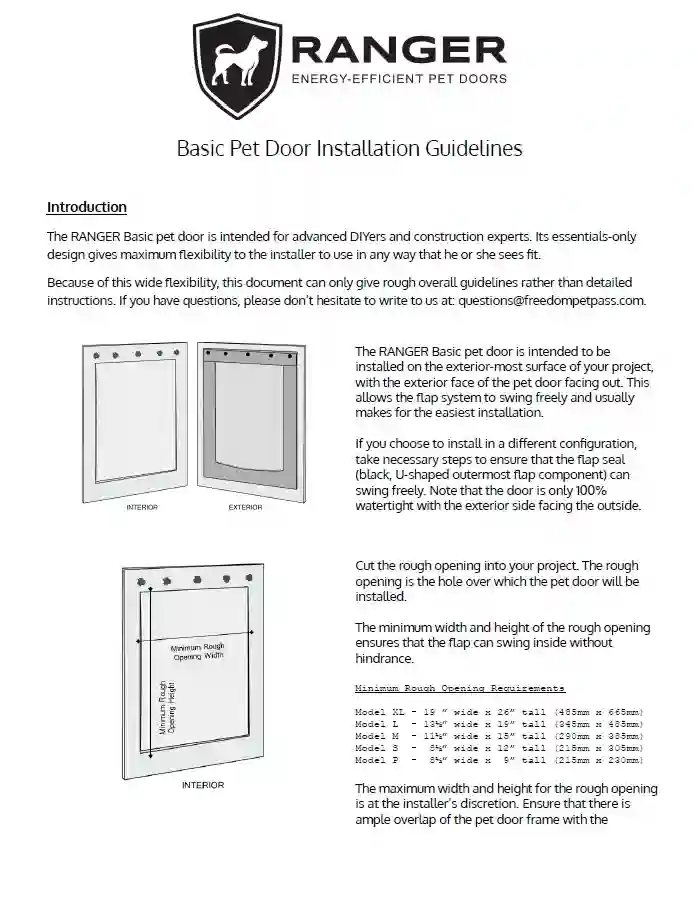
The RANGER Basic pet door is intended to be installed on the exterior-most surface of your project with the exterior face of the pet door facing out. This allows the flap system to swing freely and usually makes for the easiest installation.
If you choose to install in a different configuration, take necessary steps to ensure that the flap seal (black, U-shaped outermost flap component) can swing freely. Note that the door is only 100% watertight with the exterior side facing the outside.
1. Cut Rough Opening
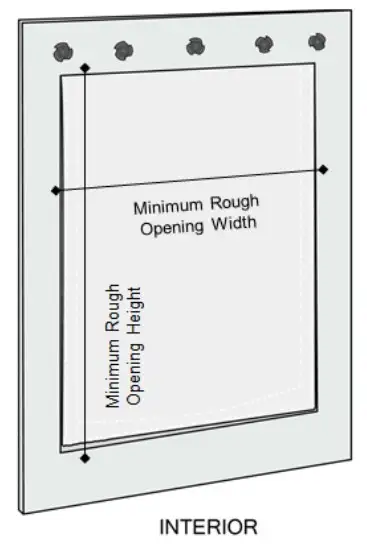
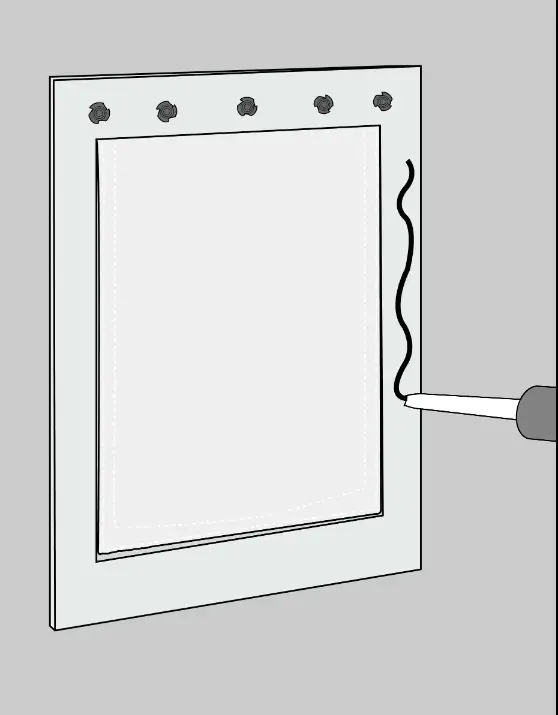
Cut the rough opening into your project. The rough opening is the hole over which the pet door will be installed.
The minimum width and height of the rough opening ensures that the flap can swing inside without hindrance.
|
Model XL |
19” wide x 26” tall (485 mm x 665 mm) |
|
Model L |
13-1/2” wide x 19” tall (345 mm x 485 mm) |
|
Model M |
11-1/2” wide x 15” tall (290 mm x 385 mm) |
|
Model S |
8-1/2” wide x 12” tall (215 mm x 305 mm) |
The maximum width and height for the rough opening is at the installer’s discretion. Ensure that there is ample overlap of the pet door frame with the surface on which it will be mounted for secure attachment (see last step).
2. Add Construction Adhesive (optional)
Prior to attaching the Basic door over the rough opening, consider adding a bead of construction adhesive or exterior-grade silicone to the back of the frame of the door. This will ensure a good, weatherproof seal.
This optional step may not make sense for every situation and should be done at the installer’s discretion.
3. Attach Pet Door
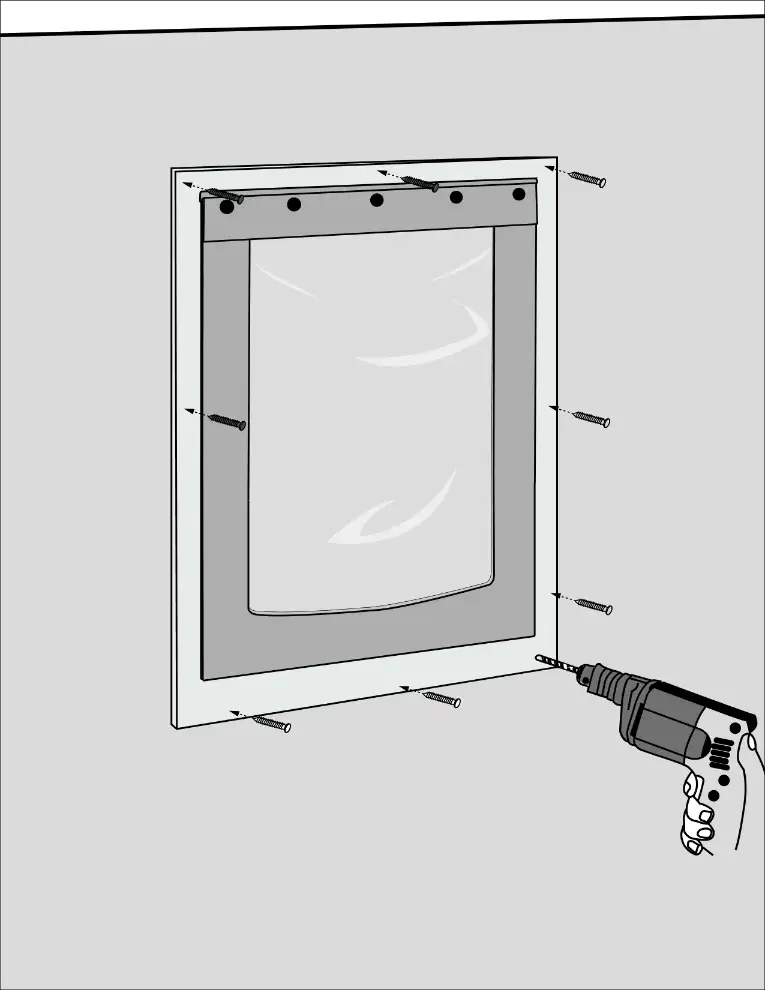
The Basic pet door can be secured to the project in any way the installer sees fit.
The easiest way to attach the Basic pet door to your project is by screwing through the pet door frame into the project substrate.
Prior to attachment, ensure that the flap system can open and close freely without getting caught on the rough opening.
Use a sufficient number of exterior-grade fasteners to achieve a sturdy attachment.
After installation, ensure that there are no sharp edges, protruding fasteners, or other hazards that could harm pets using the door.